What is Redis
You are reading this post, I assume you already have a bit idea what is Redis. But just a short introduction: Redis is an open source in-memory database. It supports basic data type like strings as well as advanced data structures like lists and hashes.Redis is very simple to setup and use. Below is simple instruction on how to install and configure Redis on CentOS 7.
Redis official documentation here
Installation
Run the command below to stall Redis server on Centos.
If you are running into an error saying “no package available”, make sure you have repo epel installed and enabled because redis is a part of epel on Centos.
You can use the command below to list all the enabled repos:
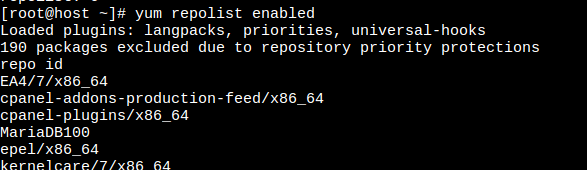
If you don’t see the epel repo in the list, try the command below to enable it.
|
|
yum-config-manager --enable epel |
or install it
Start the Redis Server
Now you can start Redis server and enable to auto-start on system reboot by using the commands below.
|
|
systemctl enable redis systemctl start redis |
By default, Redis server listens on 6379 port, and you can run commands below to check if it is alive.

Install and Run Multiple Instance of Redis on Centos
Sometimes you will need multiple Redis instances, for example I was configuring a server for Magento 2 hosting, and I need 1 server for page cache, 1 for config cache, 1 for session storage.
You can run multiple Redis instances on different ports. By default Redis is installed under /var/lib/redis. This is considered as the work space for the default Redis insane. Memory dump is stored here. You will see a file named dump.rdb if there is any data dumped from memory.
First, to setup another Redis instance, we will need to duplicate the directory for a new instance. You can do so by running the commands below:
|
|
mkdir -p /var/lib/redis2/ chown redis /var/lib/redis2/ chgrp redis /var/lib/redis2/ |
Second, we will need to create a separate configuration file. The default config file is /etc/redis.conf
|
|
cp /etc/redis.conf /etc/redis2.conf chown redis /etc/redis2.conf |
And update configuration in the file to let the new instance run on different ports.
Lines need to be updated:
|
|
logfile "/var/log/redis/redis2.log" dir "/var/lib/redis2" pidfile "/var/run/redis/redis2.pid" port 6380 |
As you can see above, this time we are using port 6380 to host the new instance.
Then create separate service file for Centos.
|
|
cp /usr/lib/systemd/system/redis.service /usr/lib/systemd/system/redis2.service |
Lines need to be updated in the new service file
|
|
ExecStart=/usr/bin/redis-server /etc/redis2.conf --daemonize no ExecStop=/usr/bin/redis-shutdown redis2 |
Now it is time to start the new instance and enable to auto-start on system reboot just like what we did when we install the first instance.
|
|
systemctl enable redis2 systemctl start redis2 |
Check the status or our second instance:
Now we have 2 Redis servers running separately on porst 6379 and 6380.